Saturday, March 19, 2011

Orange and Pink Polka-dots!


I absolutely love these colors together. My friend Mindy and I made these for her daughters 2nd birthday. She did the cutest theme- polka-dots. I want to copy her and do this for one of Lucy's birthdays. All of her food was round: donut holes, sandwiches that she cut out with a circle cookie cutter, fruit that she melon balled, little jars full of round candies, and Ritz sandwich crackers. I wish I would have taken pictures of it all. She couldn't find a tablecloth that she loved so she covered the table in cute wrapping paper, what a genius! She also had fun polka dotted balloons everywhere. It was so fun!

We decided to have the cupcakes match the cute plates and I fell in love with these colors. Mindy found these cute polka dot sprinkles at Wal-Mart in the wedding/party favor isle. This was by far the easiest cupcake project ever. I need to do more projects with her. They say simple is better and in this case it really was. They turned out cute even though some of the frosting didn't stay very well. Thanks Mindy!

Spring is in the air!

I made these for our ward talent show. I love this time of year when I get to decorate with Spring in mind! The colors are so happy!
The S-P-R-I-N-G letters are made with white chocolate. I melted it in a squeeze bottle, traced the letters on wax paper, let them dry then placed them on the cupcakes.
This jelly bean cupcake flower was so fun to do. I used the Jolly Rancher kind to get these fun colors. The yellow flower by the jelly beans was made by cutting a marshmallow in thirds and coating the sticky part in colored sugar. I used Dots candy for the centers.
The bows and loopy flowers are made from marshmallow fondant. I attempted to make my own. It worked but the pieces didn't dry completely like store bought fondant even though I did them 3 days prior. It was easy to make and work with though. I read somewhere that if your making flowers you can add gum paste so I will try this next time and see if it makes a difference. Here's the recipe for Marshmallow fondant:

16 oz marshmallows (make sure they're not stale)
2 T water
2 lbs powdered sugar (sift it to get out the little lumps)
1/2 c crisco

Coat the bowl of your stand mixer with a layer of crisco & attach your dough hook. Melt the marshmallows and water in a double broiler or microwave (I microwave) then pour into your prepared bowl. Pour in 1/2-3/4 of the powdered sugar & mix on low. As that gets mixed in, add the remaining powdered sugar. It ends up being like play dough. If it's too thick/dry don't add water, add crisco. If it's too soft add more powdered sugar. This recipe makes about 3 lbs but you can 1/2 it pretty easily if you want. Store it in a ziplock & it will keep quite a while.

For the rainbow cupcake I used the Airhead licorice pieces for the rainbow (it stuck in the cupcake really well) and piped on clouds.

Wednesday, March 2, 2011

Bad Case Of Stripes Cupcakes

I got to go read this book to Ethan's first grade class. He choose the book and thought it would be cool if I could bring a treat to go with it. He is so my son! Treats just make everything more fun! I wasn't sure what to bring that would go with the story except Lima Beans and that was definitely not cool so my next though was cupcakes- surprised?
This is what I came up with.

To get the stripes I used a parchment bag (its better if it's disposable) and painted 5 different colored stripes on the inside of the bag with a small paint brush and the Wilton gel colors. The lines need to be thick enough to color the whole bag of white frosting but not to thick that it comes out clumpy. Once you've painted the bag, carefully add the white frosting so you don't smear the stripes too bad. Then have fun seeing all the fun colors it makes.

Saturday, February 26, 2011

White cupcakes


Jessica and I made these for her daughter's 4th birthday. She wanted an all white party. I think it turned out so cute. Jessica found all the fun decorations in the wedding isles of different stores. I think this would be a fun 8th birthday too!

I had so much fun decorating these. For the heart toppers we made them out of white chocolate and used gold edible dust to decorate.

Some of the hearts we wrote I's or Ivy on them with the gold dust. I had a great time experimenting with the dust.

What a fun party Jessica! I loved it! Thanks for taking these pictures since I forgot my camera. I'm glad I did because you did a much better job than I would have.

Thursday, February 17, 2011

Happy 2nd Birthday Wyatt!


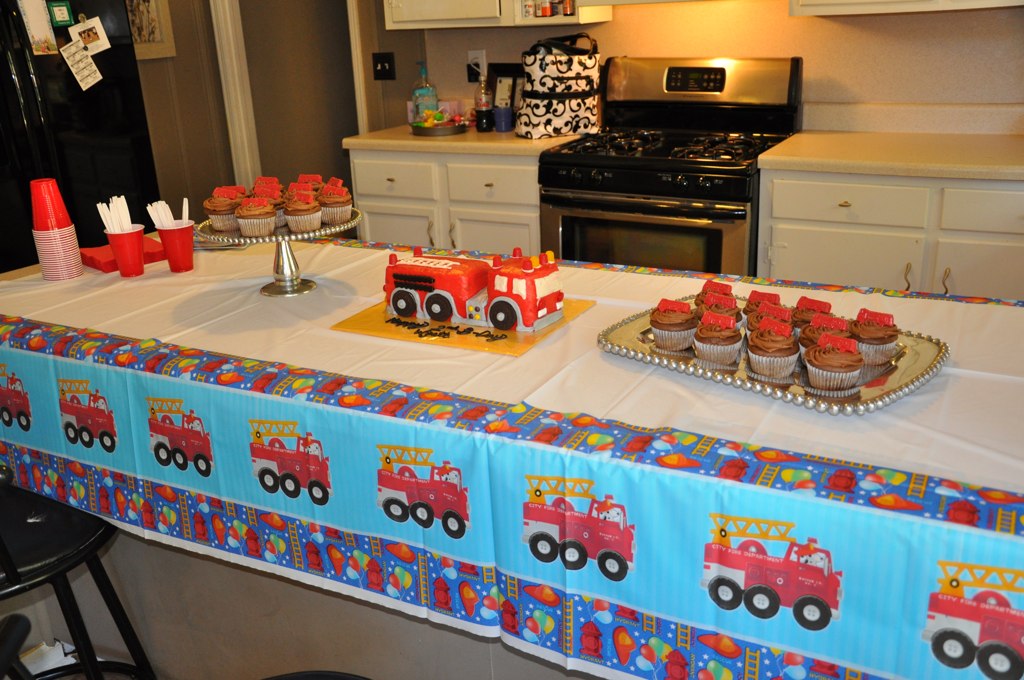
My 2 year old loves fire trucks and Ethan and I found this on the howdini.com website and decided this would be a perfect cake for his birthday.

Here is the site if you want to learn how to make it http://www.howdini.com/howdini-video-10462237.html.
The only things I did different were adding long black licorice instead of the coiled because they don't sell them here, I also added control buttons (mini Reeses pieces) on the gray part, and eclipse gum for head lights.
*I loved the new trick I learned to make the frosting look more smooth- dip your knife in warm water, shake off excess water and run over the frosting.

I also made Chocolate Peanut Butter Cup cupcakes (for recipe see Cupcakes Galore post.) I found this fire truck mold at my new favorite cake supply store (Louise's Cakes and Things) and thought it was perfect to make these be simple but cute. I just melted red candy melts, put it in a ziplock bag with the corner cut then piped it into the molds, let them set up and popped them out. I also made suckers for the kids to take home (I forgot to get a picture of these.)

Happy Birthday my sweet Wyatt!

Monday, February 14, 2011

Valentine cupcakes


I made these mini cupcakes for Wyatt's Valentine's Day playgroup. I needed them to be simple so I just used sprinkles and the left over candy from our Valentines gingerbread houses for toppers. I used a white cake mix and almond flavored buttercream frosting. I think it's easier to frost a cupcake by piping it on then spreading frosting plus it looks cuter. Too bad the clean up takes more time.

Thursday, February 10, 2011

Be my Valentine!


Not sure what to do with any left over mini candy canes from Christmas? My creative friend Mar gave me this super cute idea. It was fun having all these colored ones-I picked them up from Target after Christmas.
I made these for Ethan to take to school for his Valentines. They were super easy to do. I laid the candy canes on wax paper with the sucker stick in the center, put melted white chocolate in a zip lock bag with the corner cut, piped the chocolate in the center of the heart, smoothed it out, then added sprinkles and sugar icing decorations. If your chocolate is too thick just add a small amount of Crisco to help thin it out.

Once they were dry I put them in a little cellophane bag with a ribbon tied around it. I love this idea. I will be sure to pick up more candy canes next year. Thanks Mar! I love this holiday!
Happy Valentines Day!